Sunday, August 25, 2013

Playing with color (lots of pictures)

Yesterday I went to Monrovia to the Griffin Dye Works dye workshop.  I took with me some wool skeins, a pound cone of 16/2 natural linen, 3 balls of #20 Hemp twine and some silk caps.  I wasn't sure what I was going to us so better to much then watching everyone else have fun.  When I got there there were three others busy at work, so I dropped off the spinning wheel (just in case I had time) and set up my little area. 

The dyes we were "working" with was Logwood (purples), Kamala (yellows), Walnut (browns), Alkanet (reds), Brazilwood (pinks) and the ever popular Indigo (blues).  There was also a pot with Alum for pre-mordanting the yarns of fabric (whatever you brought).

Now, I happen to be doing a dye demo in October (one of five others - see Great Western War) and thought this way I could play with Indigo and so when I got my Woad going, I'd have a better idea of what is going on.  The other dye I will be using is Weld (yellow) and I was going to use wool yarn and needed to decide between hemp or linen (of the same family).

I had made up some 1 oz / 50 yard skeins of wool singles (sheep unknown as this was gifted roving, 16 twists per inch) and put two in the alum water.  I also had a 159 yard skein (also single, 16 tpi) and added it to the pot.  While those were soaking I skeined off about 100 yards of of the linen and skeined one ball of the hemp.  Now, do I remember where I got this hemp?  NO.  It was ten balls of a box of twelve I acquired many years ago - it may have been at a fiber sale, it may have been "hey, you want for free?".  And I had been assured that it would get softer as it was used and wash.

So by this time the wool was more then ready and so out came the wool and in went the linen  and hemp.  At this point I had to pick Bjo's brain - how long should the linen and hemp soak?  I haven't tried to dye linen as I once was told that it can be difficult and won't take color well.  She said it had to really soak well and to untwist it to make sure it was wet through and through. 

So back to the wool.  First the Logwood with the full skein, one sample skein in the Kamala and one sample skein in the Indigo.   At some point I noticed that the Kamala was boiling.  Kamala is one of the heat sensitive dyes that will going orange when it gets to hot.  Darn!  After 1/2 hour I pulled the wool out of the dye pot and gave them a rinse.  I got to watch the Indigo change from green to blue and set it aside to rest for a while to see if I wanted a deeper shade of blue (I didn't).


The Kamala came out a deep yellow with a slight orange tint. 


The Logwood was a deep purple.
 
 
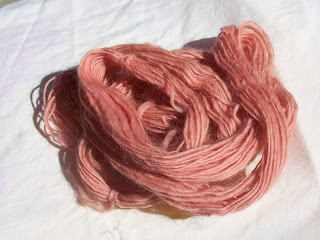
The Brazilwood was doing strange and wonderful things.  One of the others (Gunger) had put a cotton cloth in the Brazilwood.  When she took it out of the pot it was a nice coral color, but once she rinsed it, it turned pink.  Steven, on the other hand, use a silk scarve and it was the nice coral color.  I used an un-mordanted slien of wool and got . . .


Both the linen and the hemp were checked and then taken to the Indigo pot and left there for about 1/2 hour.  So what was next?  Bjo decided to make a new Kamala pot so we could get a nice yellow.  After it was ready I through in a sample skein that I had wetted in just plain water and added it to the pot.  I got one more skein wetted it with water and put it in the Brazilwood pot. 

The skein in the Kamala was in there for about 10 minutes and then moved to the Indigo pot for 10 mins.  The Indigo overwhelmed the Kamala and I didn't get a green (insert sad face).


I pulled out two of my silk caps, soaked them for about 5 - 10 minutes in the alum water and one went into the Logwood and the other went into the Kamala.  By this time Bjo had removed some of the Indigo and watered it down (so it would be more of an exhaust).  Some of the others had used it as well, so I pulled the cap out of the Kamala (a very pale yellow after rinsing) and put it in the exhaust for just 5 minutes.  Again - more blue, no greens.  I guess I have some work cut out for me.

Here is the silk cap in Logwood


And the cap that was in the Kamala and Indigo


But wait!  What about the linen and hemp?  After 1/2 hour in the Indigo put, I pulled them out and let them rest.  I then checked to see if the dye went through - it did so I rinsed them.

I was not happy with the "feel" of the hemp.  It was stiff and felt like there was a glue on it.  The linen had a nice hand and would really soften with use and washing.  But is the color going to stay?


Hemp on the left

   
                          Linen on the right


Bjo says the best way she has found for the Indigo to take and not crock (come off easily) is to wash it in Orvas paste or a non detergent soap (I use Ivory), rinse it well and then let it soak overnight in cold water.  I did that and as I was washing the hemp, more and more color was coming out.  The water it soaked in also had a green color to it this morning.  The hemp itself is still stiff although it doesn't have the glue feel to it.

So a last look at the Indigos


And the Logwoods

 
Can't wait to start spinning the silk!


Saturday, July 13, 2013

Better late then never

I decided it was time to do a patterned piece - but what to weave.  Then it dawned on me that Sven and Cassandra might like something different to give out goodies in so I thought a gift bag of sorts.  Big enough for a bottle of wine or to put other types of goodies in.  So in May, I sat down, figured out the yardage, how much would need ot be dyed and ordered the dyes from Cushing.  Yes, Cushing dyes.  They are a good union dye and I used them 25 year ago when I first was learning about spinning and weaving.  And some of the yarns I dyed back then are still in excellent color.  And now Cushing has two types of dyes - for wool and other animal protein fibers and then dyes for cotton, rayons and reeds.

So my weft was a little over 1 pound of fiber and it should have fit in my large dye pot with no problem.  SHOULD is the key word.  I dyed my stuff and rinsed it and thought - maybe . . .

So I let it dry.  Now the skeins on the bottom of the pile looked really good, but the ones that more on the top of the pile - well, you know the color was not consistent.  And did I have another packet of dye - no.  So I sent off for more dyed and started warping my loom.  The dyes arrived, I re-dyed the blotchy skeins and they evened out nicely.

I did have everything ready to go including a weekend of demos - two days of all the weaving (and talking) that I want.  And I made great progress with the weaving.  The treadling was easy - maybe too easy because I would be explaining the weaving process to a group and then have to take out an inch or so of weaving (the treadling was 1,4  1,3  1,4  2,4) but I still got about 4 yards or the 9.5 yard warp done.  I was proud of myself and thought I'd have these done and sewn up for Coronation easy.


Then life happened.

And before I knew it two weeks had pass and the loom sat.

And then I tweaked my knee - and it was two more weeks before I could go out there - and then it was only for an hour.  And when I was home, the temperatures were in the 100s.

Then I called myself all kinds of names for being a weather wimp and a poo - poo weaver.  If I was a REAL weaver - I'd get this done! OK - and I have another demo to do on July 20th and I wanted something else on the loom.  So I went out to the garage - studio at 9PM in the evening when it had cooled down a little and wove for about an hour for a week.  I thought it amazing that such an easy treadling required so much concentration.  I would be weaving along - my mind would catch an idea and then before I knew it I was taking out 3 - 4 lines throws and figuring out where I goofed.

Then I ran out of weft (in the blue) with about 2/3rds of a yard to go.  So I got up extra early this last Tuesday morning, wove the remainder in a green and finished weaving it.  That afternoon after I got home from work, I cut it off the loom and washed it.  This last Thursday I started sewing and got 4 of 19 bags done.


There they are - nicely pressed and ready to go.  Now to finish sewing the lot this weekend and start warping the loom for the demo next Saturday - what to do, what to do.

I like doing patterned pieces and plan to do more.

Saturday, June 29, 2013

I'm dyeing out here!

So it dawned on me shortly after my last post that I needed to get a move on creating things for the Great Western War (or GWW for short).  I need new stock and more stock (shameless plug for GriffinCliffe designs).  So all of this month, I have been telling myself to get my butt in gear.  And I have ignored myself.  So I plan a dye day.  And then life happens, so I postpone it and then it was the weekend of the Griffin DyeWorks Fiber retreat.  Except that I twisted my knee and was reclining and reading all weekend.  So here we are - with a really nice heat wave this weekend.

I can't put it off - Its bad enough I can't weave more then an hour a day (heat and knee) and today its suppose to be 99 degrees out there - it was 107 degrees at 5PM.  Nevertheless!!  Up at 7AM(ish) - dress, eat breakfast, trim the roses (front and back yards), water the compost pile and feed it (saw a nifty dung bettle come out of the pile - very pretty), uncover camp stove (oh Hunny - come kill the black widow for me), move the tables to the back yard (need them there for the 4th anyway), open dye crate, get roving, pot, dyes, water.  And I'm ready.  Time for some water - for me. 
9AM and I'm ready to play.

 
I was going with 4oz. of roving for each dye batch.  I had some unknown wool (from an estate sale last year) so I braided it loosely and with some short fiber unknown wool I got in the raffle at last year's Fiber Retreat (in a "delicates" bag) put those in my big dye pot with a 1/2 oz. of Cushings Peacock dye and let that simmer at about 160 degrees for about 1/2 hour. 
 
While that was cooking, I painted the next 4 oz. of roving with some Jacquard dyes (red, blue, yellow and green).


One nice thing I've learned about dyeing - the uglier the roving, the prettier the yarn.

So after this, it was remove the braid and bag from the dye pot and let them cool down.  So I went to another roving I had and made a tighter braid and put it in the big pot.

The next space dyed roving I used only 3 colors - as it was hotter then hell out here - I'll make my own fire.  So this was with red, yellow and orange.  yes, I know red and yellow make orange.


Nevertheless (I love that word), This gave me two differnt shades of orange.  So with this done, I turn my atterntion back to the Big Pot.  I pull the final braid out and set it aside to cool.  I dumped the dye water out (it was fairly clear - just  a little bit of green in it) and put in freah water to steam my other two dyed roving.


 Here are the two braids - I did the first one loose (I think I said that) and second one a lot tighter - to have more "white" space

 
The day's work


Done at 1:30PM - and I went inside the house and died.  Next week - natural dyes stuff (got to get spinning).

Oh, and Hubby - The cement is only a little bit dyed - You'll never notice (much).  :-)
 

Monday, May 6, 2013

Read the instructions FIRST

So, I had a few good sales the first of this year and last month I decided I was going to get the Freedom Flyer for my Joy wheel.  It had been a toss-up over saving for a Country Spinner or just getting a new flyer set-up.  $600 vs $100.00 - you can guess which one.


Why get a new flyer setup - well, I'm spinning more chunky yarns (not art yarn yet) and as I love to add beads to the yarns, the beads would get caught on the hooks.  In fact I'm working on a hand dyed green Tussah silk and I wanted to add green, blue and purple glass beads (plyed with a pale green cotton / poly sewing thread).  With the Freedom Flyer there are no hooks. - So I order the flyer on a Wednesday and Friday it was in my hands!

I pull every thing out of the box - there's the flyer and the BIG bobbin and a small bag 'O parts.  Parts.  I grab the instruction sheets (there were 2) and starting reading the sheet about the parts bag.  It said I had to change the shaft that you screw the flyer / bobbin in to.  Drat!  I had hoped for a "plug and play".  So the instructions  talked about removing the "E" clips (beware - they fly) and taking the back off, then tapping out the old shaft, etc.  I'll do that later.

So later is 2 weeks later - I NEED to spin up the blue wool and ply the pearls into it for this weekend.  Try as I could, I was not able to remove the "E" clip.  Drat!  I'm going to have to take everything up to The Village Spinning and Weaving shop and hope they can change this out for me.  Then I decided to read the other sheet - the one on setting up the bobbin.  There was this little note that read something like - if your Joy was made after 2002, don't worry about changing out the parts.  Fix the brake band and go for it.  I didn't have to change anything <palm to forehead>.

Sometimes I swear I am such a guy.